
Short story: a member of my family got a refurbished TP-Link repeater TL-WA860RE v1 from Amazon a while ago . He tried to configure it but could not, so just stored it in the box until last month, I came to his home and asked him about the repeater (at that point warranty was already expired).
As he told me he was not able to make it work, I gave it a try: The repeater was able to provide an IP address with DHCP to any computer connected to the Ethernet port, but status LED was always yellow, the WebUI was not available, and of course there was no way of configuring it (no telnet, no SSH, nothing).
In the end I discovered that the previous owner failed to flash a firmware on the device, so I saw a lot of errors regarding USB subsystem, kernel modules and even Squash Filesystem:
usb 1-1: new full speed USB device using ath-ehci and address 3
usb 1-1: device descriptor read/64, error -71
ip_tables: (C) 2000-2006 Netfilter Core Team
insmod: cannot open module `/lib/modules/2.6.31/kernel/iptable_raw.ko': No such file or directory
usb 1-1: device not accepting address 4, error -71
usb 1-1: new full speed USB device using ath-ehci and address 5
insmod: cannot open module `/lib/modules/2.6.31/kernel/flashid.ko': No such file or directory
PPPoL2TP kernel driver, V1.0
PPTP driver version 0.8.3
insmod: cannot open module `/lib/modules/2.6.31/kernel/harmony.ko': No such file or directory
usb 1-1: device not accepting address 5, error -71
hub 1-0:1.0: unable to enumerate USB device on port 1
unlzma/peek_old_byte: position 7496095 out of range
unlzma/peek_old_byte: position 268707968 out of range
SQUASHFS error: Unable to read data cache entry [217662]
SQUASHFS error: Unable to read page, block 217662, size 9973
at the serial console (we will see how to connect later).
So after buying a new one for him, I decided to take the bricked repeater home.
Unlike other routers, there is no way to boot the repeater into a recovery mode where it keeps checking a TFTP server with the firmware, so the only way of fixing it was opening the case and connecting a USB to serial cable to the board.
Before we start, these are the requirements:
- Any GNU/Linux distribution (other OS are possible, but I did not try).
- A phillips 0 screwdriver (or similar).
- A USB to Serial Bridge Controller (I use a PL-2303HX).
- Soldering iron for electronics (not strictly mandatory, you could find other ways, but this is the easiest)
- Optional: A pry tool, such as those used to open smartphones, tables or modern laptops.
Opening the case
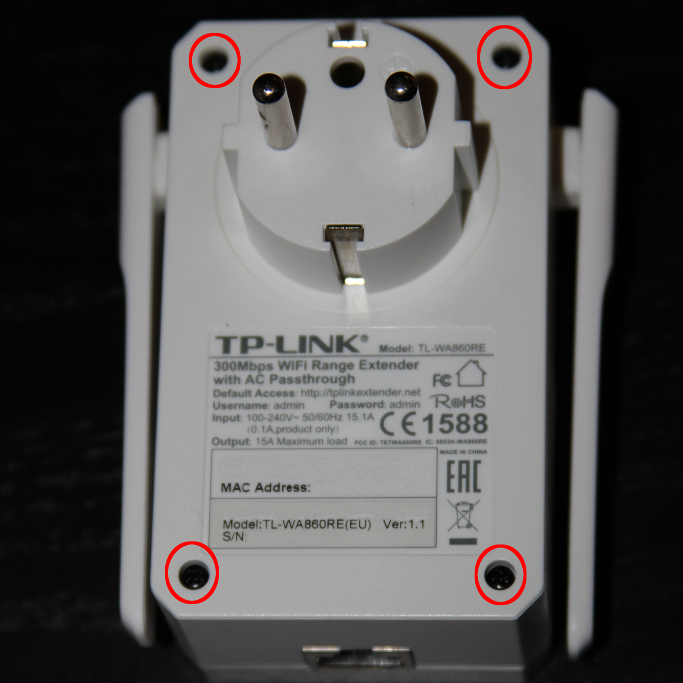
First, remove the four screws:
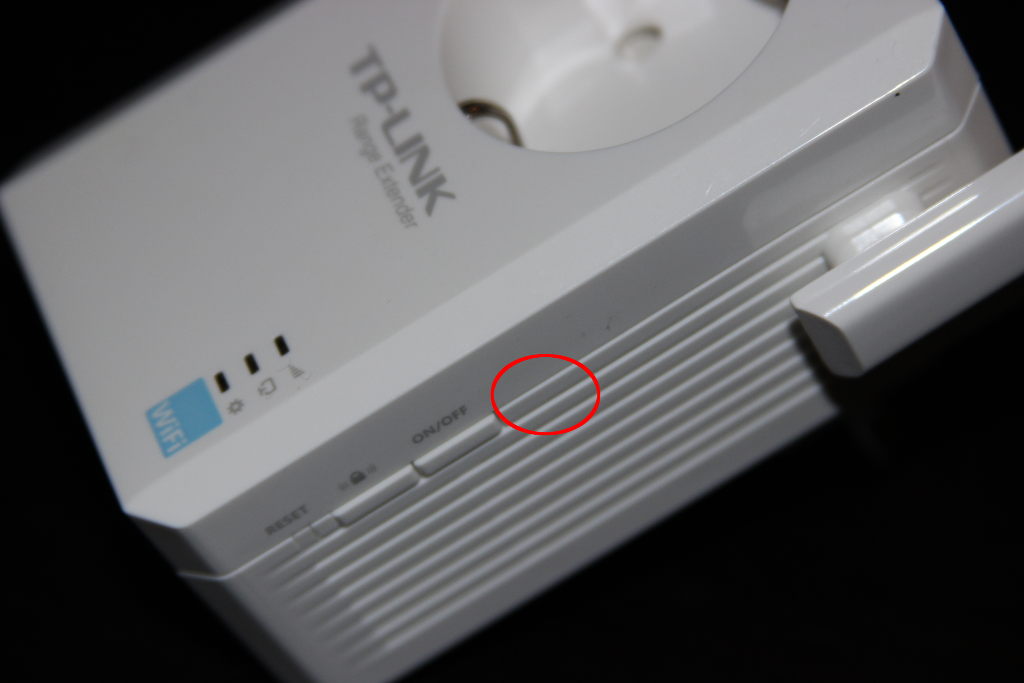
Then open the case gently, using a pry tool. Take note of the approximated location of the two places where the plastic pieces holding the case together are.

The board
You will see pin TP9 (RX) and pin TP10 (TX). Ground are the antennas screens (you only need to use one). Click on the image to open it with more resolution:
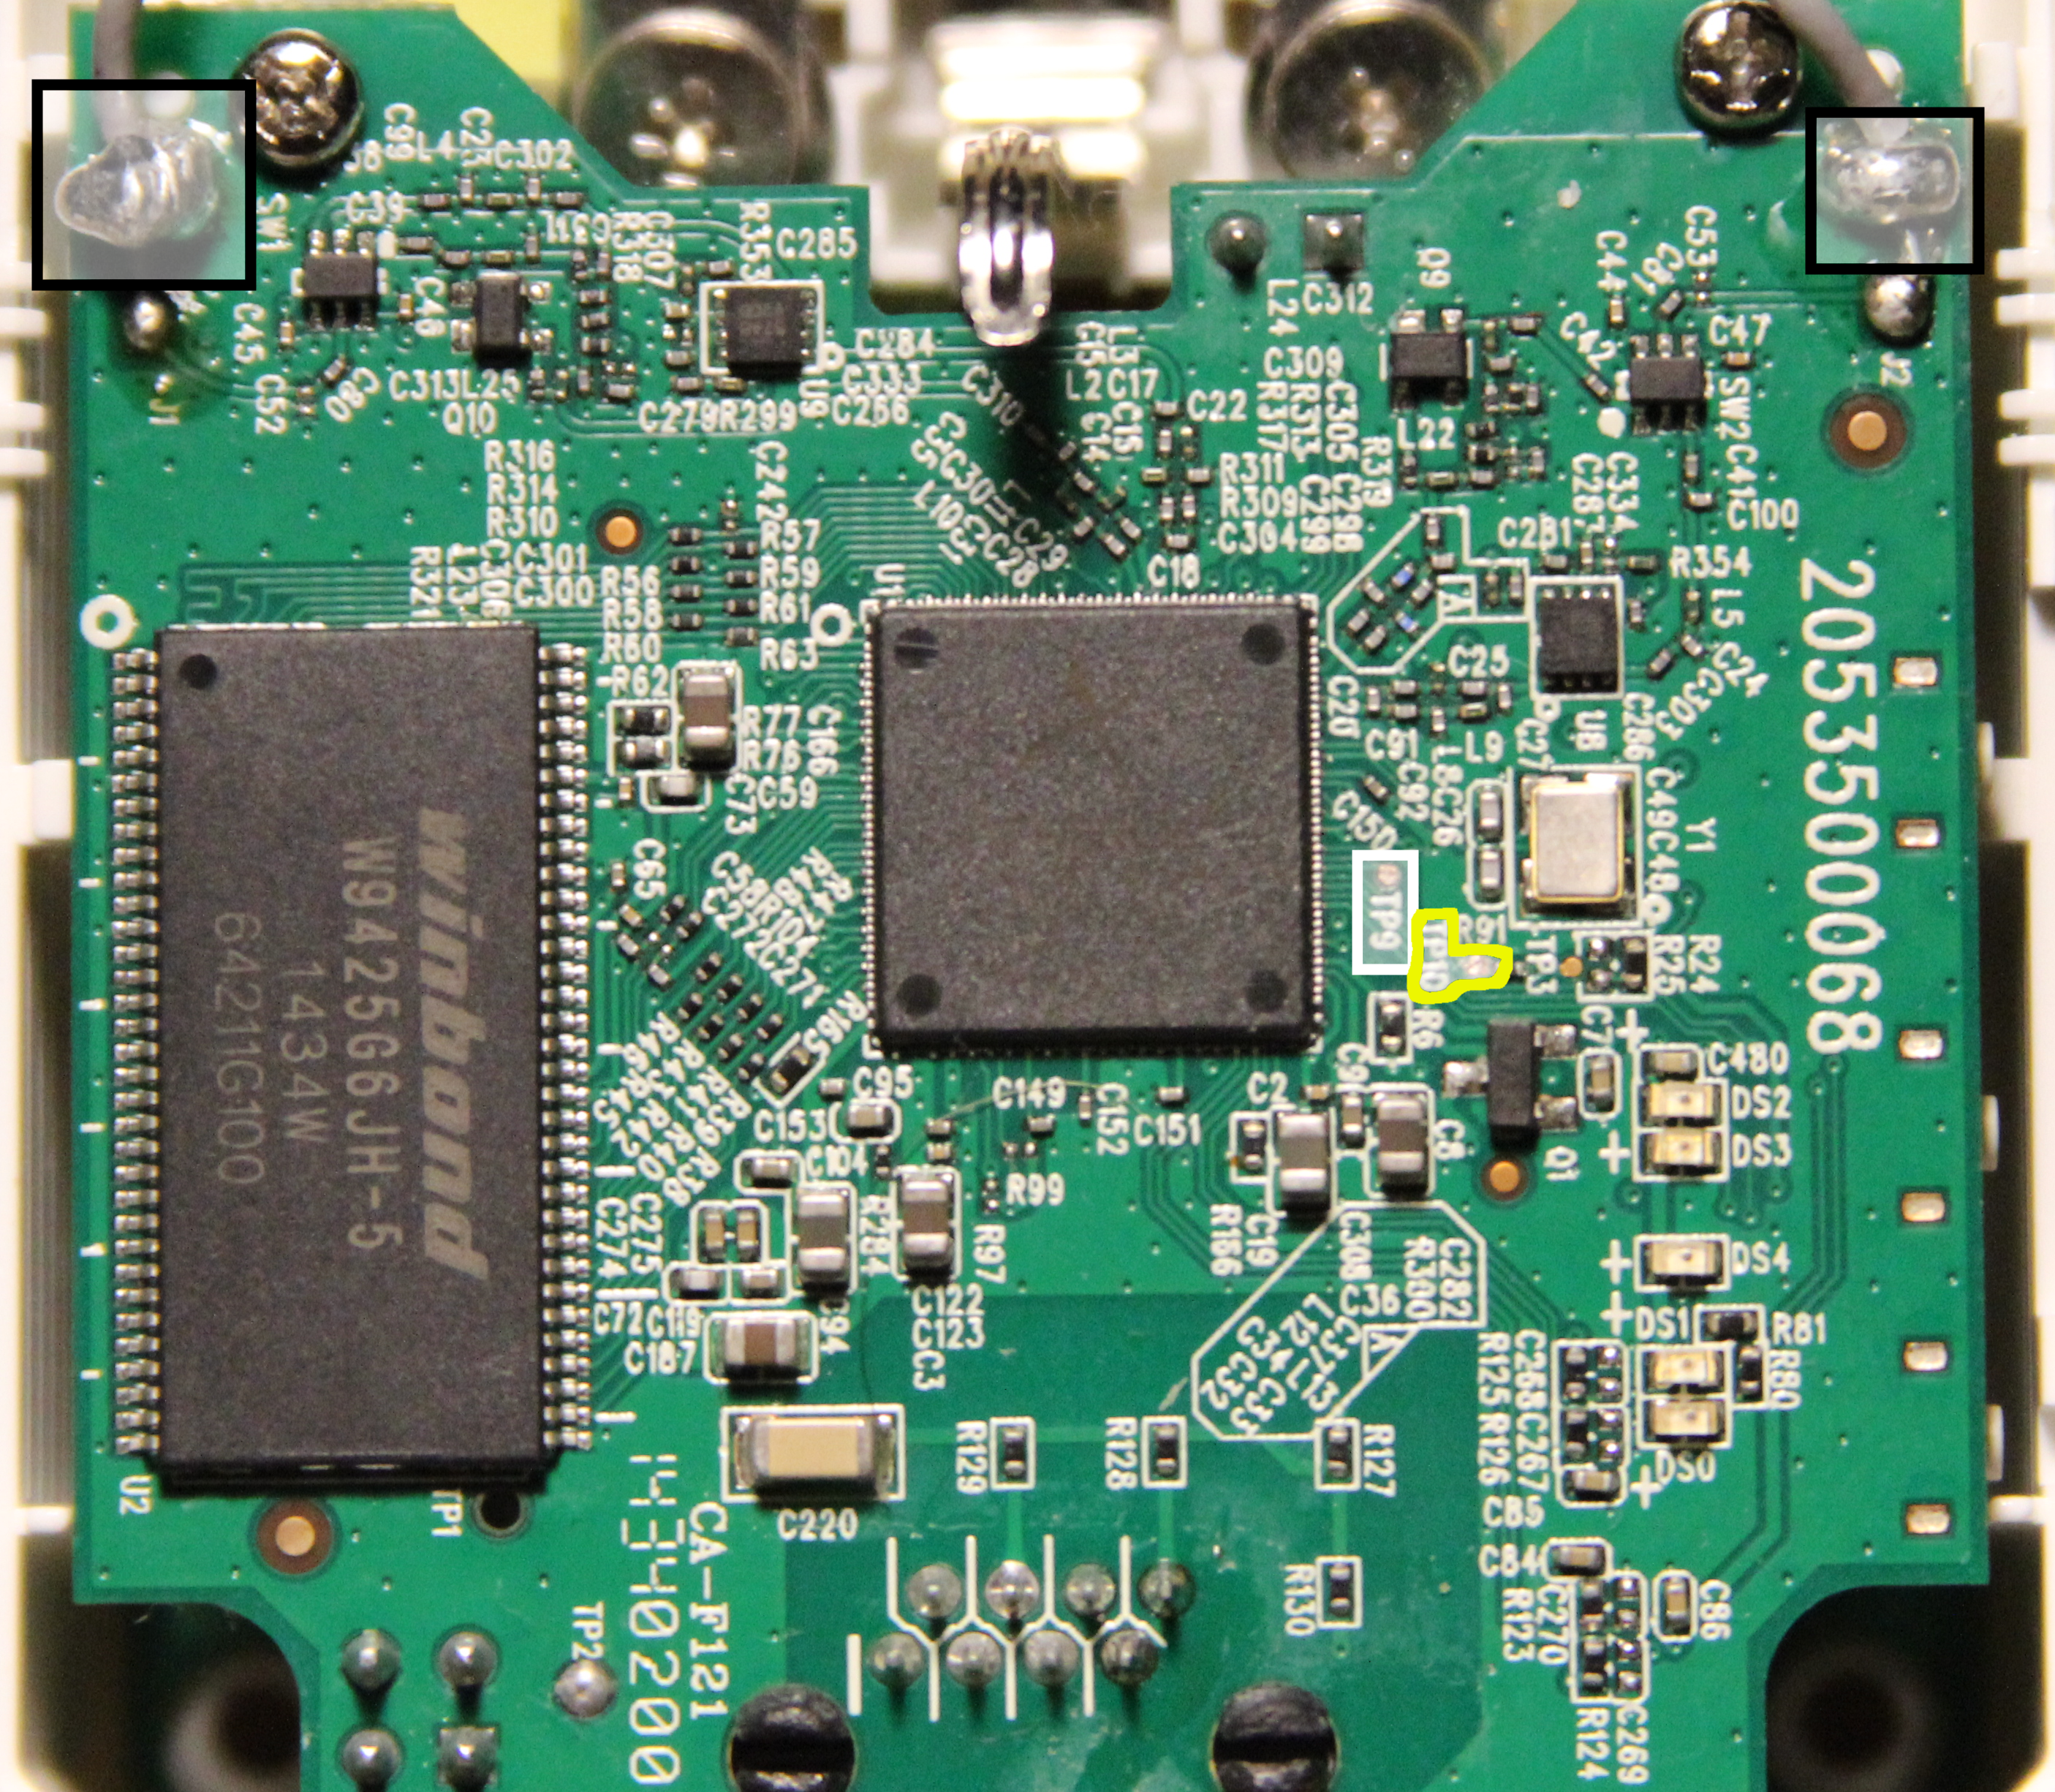 You will need to connect the USB to Serial Bridge Controller. You should solder three cables, or if you have some help and you are not too used to soldering small electronics, solder just the ground and get someone to connect a couple of dupont cables to TP9 and TP10 while you work.
Thanks to Heinz for this useful post in Polish about the connections.
Download an adapt the firmware
Next, download the latest firmware for the repeater from the official TP-Link website and unzip the file.
As mentioned at the OpenWrt wiki entry for the device, the bootloader needs to be removed for the firmware, so just run:
dd if=<original_file> of=tplink.bin skip=257 bs=512
Install and configure a TFTP server
Then install a TFTP server and make sure this file is served. To do this, follow a guide for your distribution.
As soon as the TFTP server is ready, cop tplink.bin to the folder that is used to serve content, and connect an Ethernet cable to the repeater and to your router, or switch or any ethernet port that allows reaching the TFTP server you just installed.
Entering rescue mode
Connect using any serial client to the USB to Serial Bridge Controller, that will be usually at /dev/ttyUSB0, at 115200 baud.
In my case I use miniterm:
miniterm /dev/ttyUSB0 115200
You will see the following text:
U-Boot 1.1.4 (Apr 11 2014 - 14:11:16)
U-boot AP123

DRAM:  32 MB
id read 0x100000ff
Flash:  4 MB
Using default environment

In:    serial
Out:   serial
Err:   serial
Net:   ag934x_enet_initialize...
wasp reset mask:c03300
WASP ----> S27 PHY
GMAC: cfg1 0x5 cfg2 0x7114
eth0: ba:be:fa:ce:08:41
s27 reg init
athrs27_phy_setup ATHR_PHY_CONTROL 4: 0x1000
athrs27_phy_setup ATHR_PHY_SPEC_STAUS 4: 0x10
eth0 up
WASP ----> S27 PHY
GMAC: cfg1 0xf cfg2 0x7214
eth1: ba:be:fa:ce:08:41
s27 reg init lan
ATHRS27: resetting s27
ATHRS27: s27 reset done
athrs27_phy_setup ATHR_PHY_CONTROL 0: 0x1000
athrs27_phy_setup ATHR_PHY_SPEC_STAUS 0: 0x10
athrs27_phy_setup ATHR_PHY_CONTROL 1: 0x1000
athrs27_phy_setup ATHR_PHY_SPEC_STAUS 1: 0x10
athrs27_phy_setup ATHR_PHY_CONTROL 2: 0x1000
athrs27_phy_setup ATHR_PHY_SPEC_STAUS 2: 0x10
athrs27_phy_setup ATHR_PHY_CONTROL 3: 0x1000
athrs27_phy_setup ATHR_PHY_SPEC_STAUS 3: 0x10
eth1 up
eth0, eth1
Autobooting in 1 seconds
As soon as you see “Autobooting in 1 seconds” you need to type tpl and press intro. If you miss it, just reboot the device and try again.
You will get a prompt:
wasp>
This is a prompt that will allow us to download the firmware from a remote TFTP server.
Reinstalling the firmware
Let’s have a look at the parameters with printenv.
You should see something similar to:
wasp> printenv
bootargs=console=ttyS0,115200 root=31:02 rootfstype=squashfs init=/sbin/init mtdparts=ath-nor0:128k(u-boot),1024k(kernel),6912k(rootfs),64k(config),64k(art)
bootcmd=bootm 0x9f020000
bootdelay=1
baudrate=115200
ethaddr=0xba:0xbe:0xfa:0xce:0x08:0x41
ipaddr=192.168.1.111
serverip=192.168.1.100
dir=
bc=ap123
lu=tftp 0x81000000 ${dir}u-boot.bin&&erase 0x9f000000 +$filesize;cp.b $fileaddr 0x9f000000 $filesize
lf=tftp 0x81000000 ${dir}${bc}-squashfs&&erase 0x9f120000 +$filesize;cp.b $fileaddr 0x9f120000 $filesize
stdin=serial
stdout=serial
stderr=serial
ethact=eth0
Most probably you will need to adjust the ipaddr (IP for the repeater) and serverip (IP for the TFTP server). Do it with setenv:
wasp> setenv serverip <new_server_ip>
wasp> setenv ipaddr <new_repeater_ip
And you are ready to download the firmware with the command tftpboot:
wasp> tftpboot 0x80000000 tplink.bin
enet1 port0 up
dup 1 speed 1000
Using eth1 device
TFTP from server 192.168.1.100; our IP address is 192.168.1.111
Filename 'tplink.bin'.
Load address: 0x80000000
Loading: #################################################################
#################################################################
#################################################################
#################################################################
#################################################################
#################################################################
#################################################################
#################################################################
#################################################################
#################################################################
#################################################################
######################################################
done
Bytes transferred = 3932160 (3c0000 hex)
Remove the old firmware:
wasp> erase 0x9f020000 +0x3c0000
First 0x2 last 0x3d sector size 0x10000
  61
Erased 60 sectors
Load the new one:
wasp> cp.b 0x80000000 0x9f020000 0x3c0000
Copy to Flash... write addr: 9f020000
done
And boot:
wasp> bootm 0x9f020000
You will see the repeater booting, and in a few seconds you will be able to connect to the default Wifi to configure the repeater.
Congratulations!
Now you can keep playing with the serial connection, or just close the case and start using the repeater.
Hi.
I am trying to unbrick one of these, but the command “miniterm /dev/ttyUSB0 115200” only gets me this:
— Miniterm on /dev/ttyUSB0 115200,8,N,1 —
— Quit: Ctrl+] | Menu: Ctrl+T | Help: Ctrl+T followed by Ctrl+H —
Am I missing something in your guisw, or do you think the device is beyond repair?
All three leds are flashing.
I am using a USB To RS232 TTL UART PL2303HX Auto Converter.
If the leds are working, at least the device is not completely dead (but hard to say if it’s recoverable). I guess you mean the three leds are flashing when you have something connected to the Ethernet port, and they don’t flash all at the same time or on a repetitive pattern, right?
It seems miniterm is not able to get any readings. It could mean that the device is beyond repair, yes. But it also could mean you are not connecting the cables as they should be connected. Are you by any chance connecting TX on the repeater to TX on the converter, and same for RX?
Remember you need to connect RX (device) to TX (converter) and TX (device) to RX (converter).
Also keep in mind that you enter the rescue mode right after connecting the device (do not plug and unplug the device, I’d recommend using a power strip, so you don’t need to touch the repeater at all).